
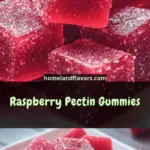
These raspberry candy gummies are a deliciously chewy and fruity treat made with real raspberries! With just a few simple ingredients, you can create homemade gummies bursting with natural berry flavor. Whether you’re making them for yourself, your family, or as a gift, these gummies are an easy and fun candy to prepare.
Why You’ll Love This Recipe
- Made with real raspberries for a fresh, natural flavor
- Simple ingredients with no artificial flavors or colors
- Fun and easy to make, perfect for all ages
- Can be coated in sugar for extra sweetness
- A delightful homemade candy that’s perfect for snacking or gifting
Ingredients
(Tip: You can find the complete list of ingredients and their measurements in the recipe card below.)
- 1 cup fresh raspberries, puréed and strained to remove seeds
- ¾ cup granulated sugar
- ¼ cup water
- 3 tablespoons liquid fruit pectin
- 1 tablespoon lemon juice
- Additional sugar for coating (optional)
Necessary Tools
- Medium saucepan
- Blender or food processor
- Fine mesh strainer
- Small baking dish
- Parchment paper
- Knife for cutting gummies
Directions
1. Prepare the Raspberry Purée
- Blend 1 cup fresh raspberries in a blender or food processor until smooth.
- Strain through a fine mesh strainer to remove seeds, leaving behind only smooth purée.
2. Cook the Mixture
- In a medium saucepan, combine raspberry purée, sugar, and water over medium heat.
- Stir constantly and bring to a gentle simmer, allowing the sugar to dissolve completely.
3. Add Pectin & Lemon Juice
- Stir in liquid fruit pectin and lemon juice, mixing well.
- Continue to simmer for 5-7 minutes, stirring frequently, until the mixture thickens.
4. Set the Gummies
- Line a small baking dish with parchment paper.
- Pour the gummy mixture into the dish, spreading evenly.
- Allow the mixture to cool at room temperature for 1-2 hours, or until set.
5. Cut & Coat
- Once firm, remove from the dish and use a sharp knife to cut into small squares or shapes.
- For a classic sugar-coated gummy, roll each piece in additional granulated sugar.
Servings and Timing
- Servings: About 20 gummies
- Prep Time: 10 minutes
- Cook Time: 10 minutes
- Setting Time: 1-2 hours
- Total Time: About 2 hours 20 minutes
Variations
- Tart Gummies: Increase lemon juice to 2 tablespoons for a tangier taste.
- Sugar-Free Version: Use a sugar substitute like monk fruit or erythritol instead of granulated sugar.
- Gelatin Gummies: Replace liquid pectin with 3 tablespoons of unflavored gelatin, dissolved in warm water.
- Mixed Berry Gummies: Blend in strawberries, blueberries, or blackberries for a mixed-berry flavor.
Storage
- Room Temperature: Store in an airtight container for up to 3 days.
- Refrigeration: Keep in the fridge for up to 1 week for the best texture.
- Freezing: Not recommended, as gummies may become too firm when thawed.
FAQs
1. Can I use frozen raspberries?
Yes! Thaw them first and drain excess liquid before blending.
2. Why did my gummies not set properly?
Make sure you simmer long enough and use liquid pectin, as it helps create the chewy texture.
3. Can I use powdered pectin instead of liquid?
Yes, but adjust the amount. Use 1 ½ tablespoons of powdered pectin for this recipe.
4. How can I make these gummies softer?
Reduce cooking time slightly and increase the liquid pectin by 1 extra tablespoon.
5. Do I have to coat them in sugar?
No! You can leave them plain or dust with powdered erythritol for a sugar-free option.
6. Can I shape these gummies into fun designs?
Yes! Use silicone candy molds for shaped gummies instead of pouring into a baking dish.
7. Can I make these vegan?
Yes! Use agar-agar powder (1 teaspoon) instead of pectin.
8. Why do my gummies feel sticky?
If too sticky, let them dry out for a few more hours or roll in cornstarch.
9. Can I add other flavors?
Yes! Try adding vanilla extract, honey, or citrus zest for extra depth of flavor.
10. How do I prevent them from melting?
Store in a cool, dry place and avoid direct sunlight.
Conclusion
These raspberry candy gummies are a fun, flavorful, and easy-to-make treat that brings natural fruit flavor into a chewy candy. Whether you enjoy them plain or coated in sugar, these homemade gummies are a perfect snack for kids and adults alike. Try them today and enjoy a burst of fresh raspberry goodness!
Print
Raspberry Candy Gummies Recipe
- Prep Time: 10 minutes
- chill time: 3 hours
- Cook Time: 5 minutes
- Total Time: 3 hours 15 minutes
- Yield: 24 gummies 1x
- Category: 24 gummies
- Method: Stovetop
- Cuisine: American
- Diet: Vegetarian
Description
These homemade raspberry gummies are soft, chewy, and bursting with real fruit flavor! Made with fresh raspberry purée, natural pectin, and a touch of lemon juice, these gummies are a fun and easy candy to make at home. Perfect for a sweet treat or a homemade gift!
Ingredients
- 1 cup fresh raspberries, puréed and strained to remove seeds
- 3/4 cup granulated sugar
- 1/4 cup water
- 3 tablespoons liquid fruit pectin
- 1 tablespoon lemon juice
- Additional sugar for coating (optional)
Instructions
Step 1: Prepare the Raspberry Purée
- Blend fresh raspberries until smooth.
- Strain the purée through a fine mesh strainer to remove seeds.
Step 2: Cook the Candy Mixture
- In a medium saucepan, combine raspberry purée, sugar, and water.
- Heat over medium heat, stirring until the sugar dissolves completely.
- Stir in lemon juice and liquid fruit pectin.
- Bring the mixture to a gentle boil and simmer for 2-3 minutes, stirring constantly.
Step 3: Set the Gummies
- Line a small baking dish with parchment paper.
- Pour the hot gummy mixture into the dish, spreading evenly.
- Let cool at room temperature for 1 hour, then refrigerate for 2-3 hours until fully set.
Step 4: Cut & Coat (Optional)
- Once firm, remove from the dish and cut into small squares or shapes using a knife.
- For a classic gummy candy finish, roll pieces in sugar to coat (optional).
Notes
- Use fresh or frozen raspberries (thaw first if using frozen).
- For a firmer texture, increase pectin slightly.
- Store in an airtight container at room temperature for up to a week or refrigerate for longer freshness.
- Want extra fun shapes? Use silicone candy molds instead of a baking dish!
Your email address will not be published. Required fields are marked *